If you’ve recently bought — or are thinking about buying — a cavitation machine for home use, one of the biggest concerns is:
“Am I using this correctly?”
This is a valid question.
Ultrasonic cavitation machines are powerful tools for body contouring, skin tightening, and reducing stubborn fat areas — but results depend heavily on proper use and consistency.
In this guide, I’ll walk you through:
- How to use a cavitation machine safely
- The most common mistakes people make
- How to get the best results at home
What Is a Cavitation Machine?
Cavitation machines use low-frequency ultrasonic waves to target fat cells beneath the skin. These waves help break down fat cells, which are then processed naturally by the body.
Most at-home devices (like the ones I recommend) combine:
- 40K Ultrasonic Cavitation
- Radio Frequency (RF)
- Vacuum therapy
- Advanced models also include laser lipo and even EMS.
These technologies work together to:
- Support fat reduction
- Improve skin firmness
- Enhance circulation
Step-by-Step: How to Use a Cavitation Machine at Home
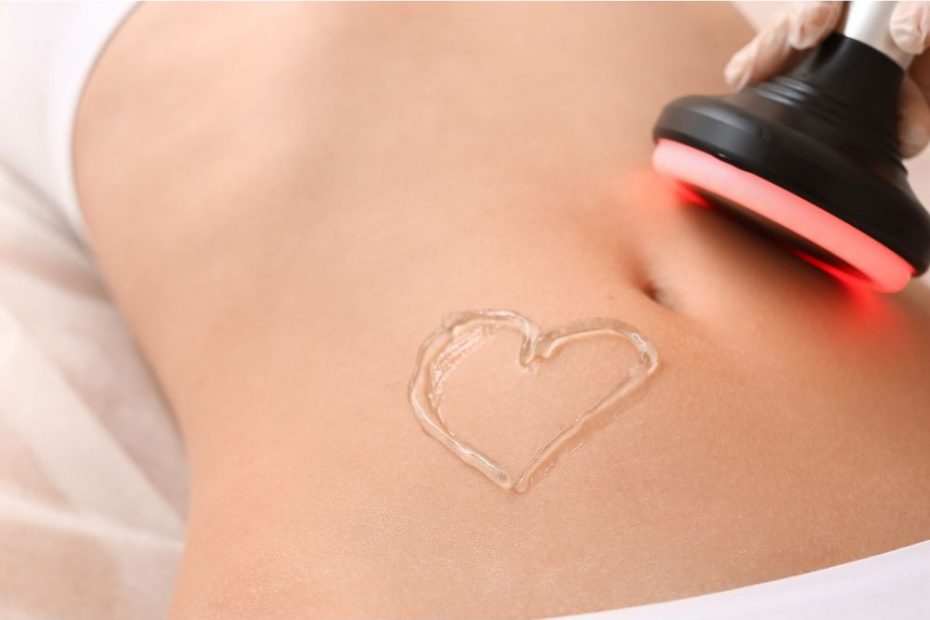
1. Always Apply Conductive Gel
Never use the device on dry skin. This is one of the most common mistakes.
Gel helps:
- Protect your skin
- Allow proper energy transfer
- Improve results
2. Use the Correct Head for the Area
Different attachments serve different purposes:
- Cavitation head – fat areas (for example, stomach and thighs)
- RF heads – skin tightening
- Vacuum – cellulite and circulation
- Laser lipo – advanced fat breakdown
- EMS – muscle toning
Using the wrong head reduces effectiveness.
3. Keep the Device Moving
Do NOT hold the device in one place.
Always move in:
- Slow circular motions
- Consistent patterns
This ensures even treatment and avoids irritation.
4. Follow Proper Session Timing
Typical guidelines:
- 20–40 minutes per area
- 2–3 times per week
More is NOT better. Overuse won’t speed results – it can actually reduce effectiveness.
5. Stay Hydrated (This Is Critical)
Hydration is essential.
Drink water:
- Before your session
- After your session
This helps your body process the broken-down fat cells.
Most Common Mistakes (Avoid These)
Using the Wrong Settings
One of the most common issues I see is settings are too high or too low.
This can:
- Reduce effectiveness
- Cause discomfort
- Lead to poor results
Not Using Enough Gel
This leads to:
- Poor contact
- Weaker results
- Skin irritation
Expecting Instant Results
Cavitation is NOT instant fat loss.
Results typically follow this pattern:
- Week 1–2: Smoother skin
- Week 3–4: Visible contouring
- Week 6+: More defined results
Inconsistent Use
This is the biggest reason people don’t see results. Consistency matters more than intensity.
Real-World Tip (From My Clients)
One thing I’ve noticed working with clients is that many people initially struggle with technique and settings.
Once corrected:
- Results improve quickly
- Treatments feel more effective
Which Cavitation Machine Should You Use?
If you’re new to at-home body sculpting:
A 3-in-1 or 4-in-1 cavitation machine is the best place to start.
- Simple
- Effective
- Easy to use
View 3-in-1 Cavitation Machine
View 4-in-1 Cavitation Machine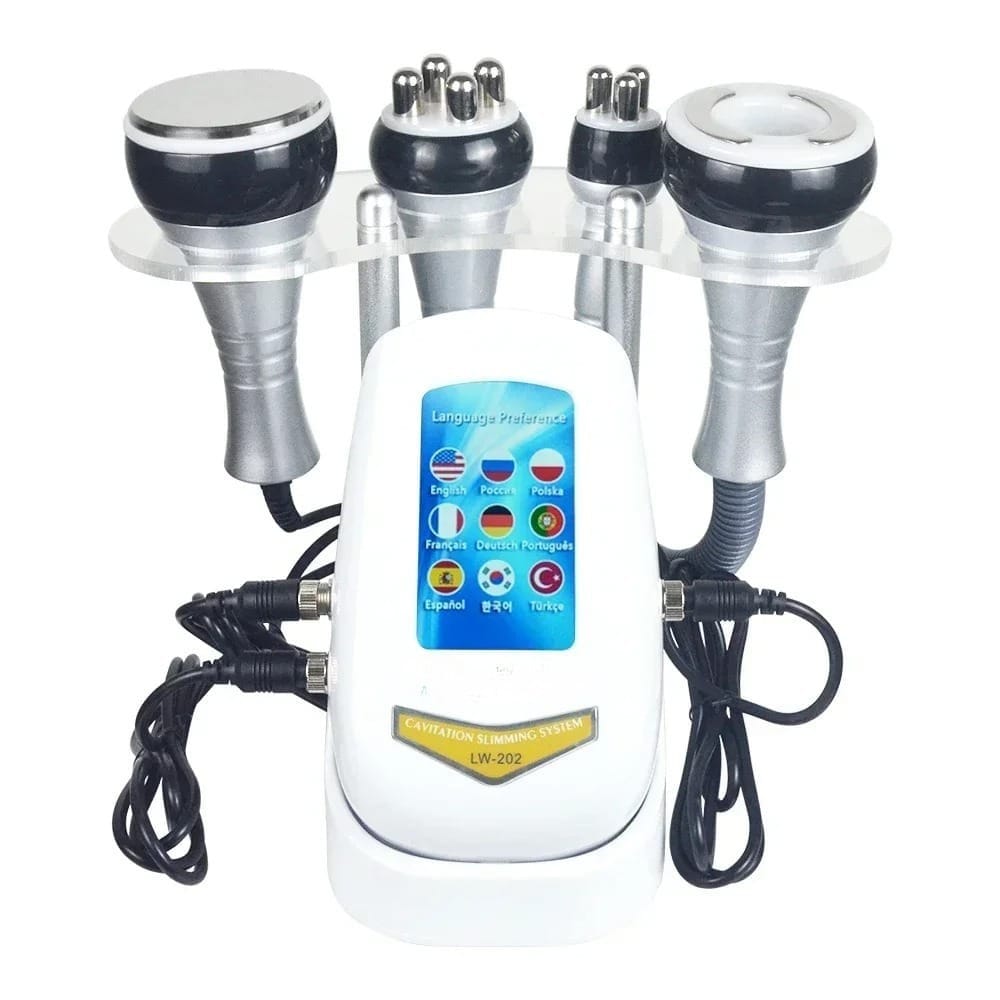
If you want more advanced results:
A 6-in-1 or 9-in-1 cavitation machine gives:
- More treatment options
- Stronger overall results
View 6-in-1 Cavitation Machine
View 9-in-1 Cavitation Machine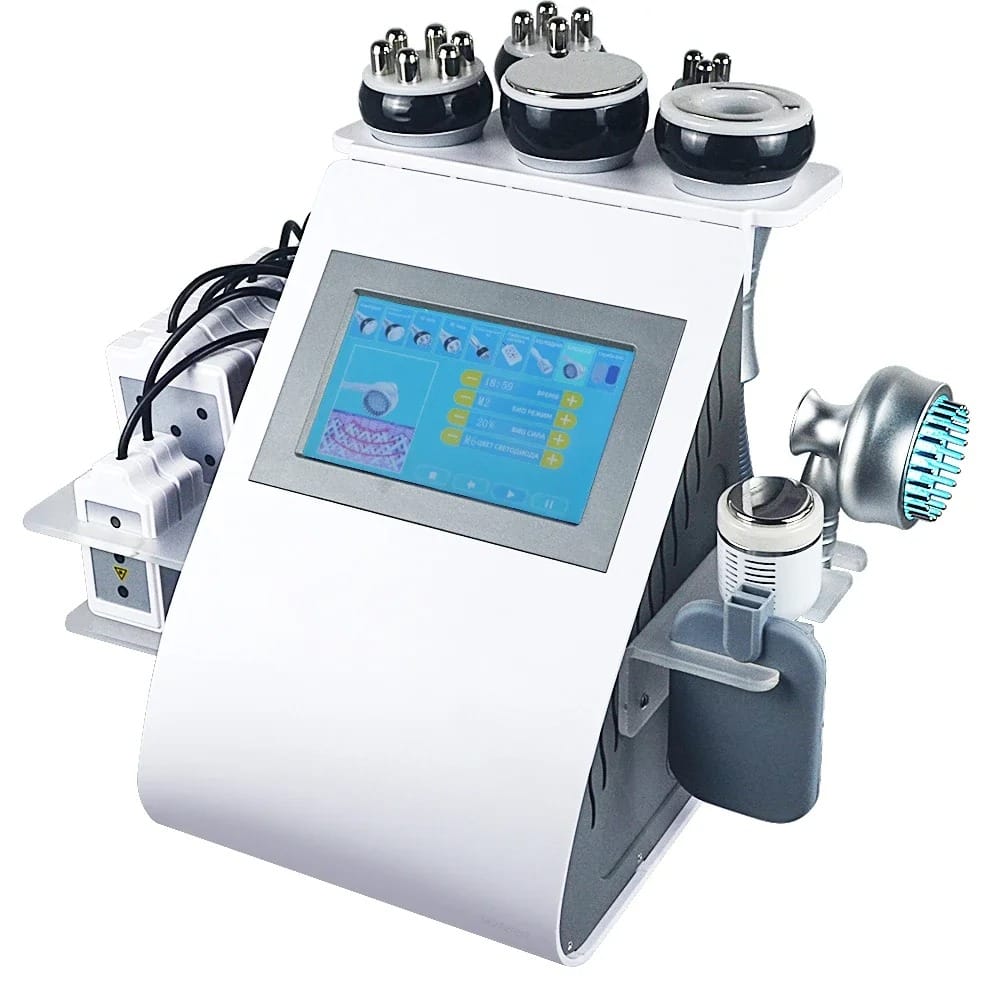
Final Thoughts
Cavitation machines can be incredibly effective for at-home body sculpting – but only when used correctly.
You can achieve noticeable improvements over time if you:
- Follow proper technique
- Stay consistent
- Support your results with hydration and lifestyle
Need Help Choosing the Right Machine?
If you’re unsure which device is right for you, check out my full comparison guide: